
Documentation
Step-by-step help for the Windows app and Web Studio. Screenshots are from the Windows app.
Getting started
- Install the Windows app from the Download page and sign in from Settings → Account.
- Create a brand (optional): logo, website, colours, watermark, soundtrack and end-screen text.
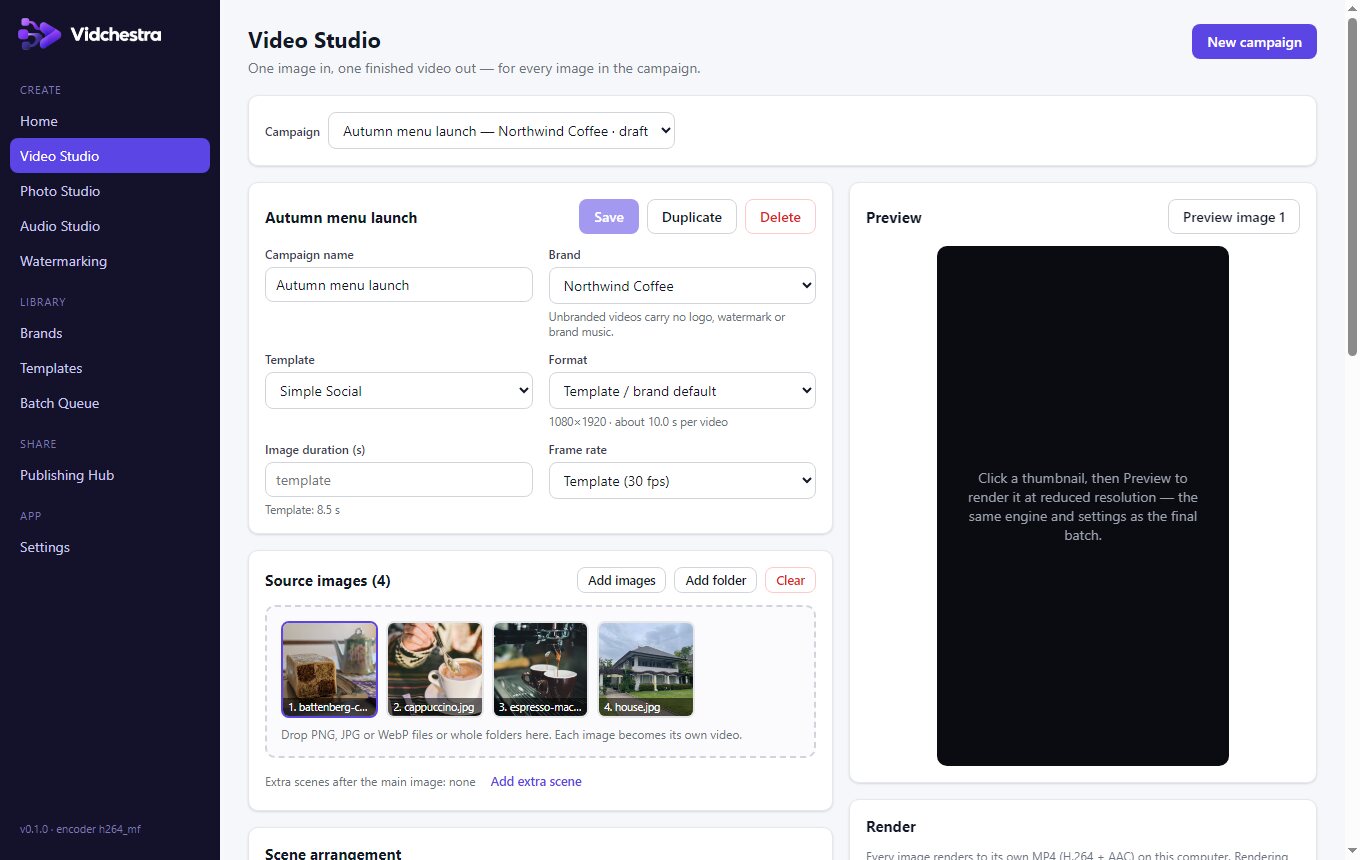
- Open Video Studio → New campaign, choose the brand and a template, add images or a folder, and press Preview.
- Press Render. Each image becomes its own MP4 in Videos\Vidchestra\<campaign> unless you choose another folder.
Templates
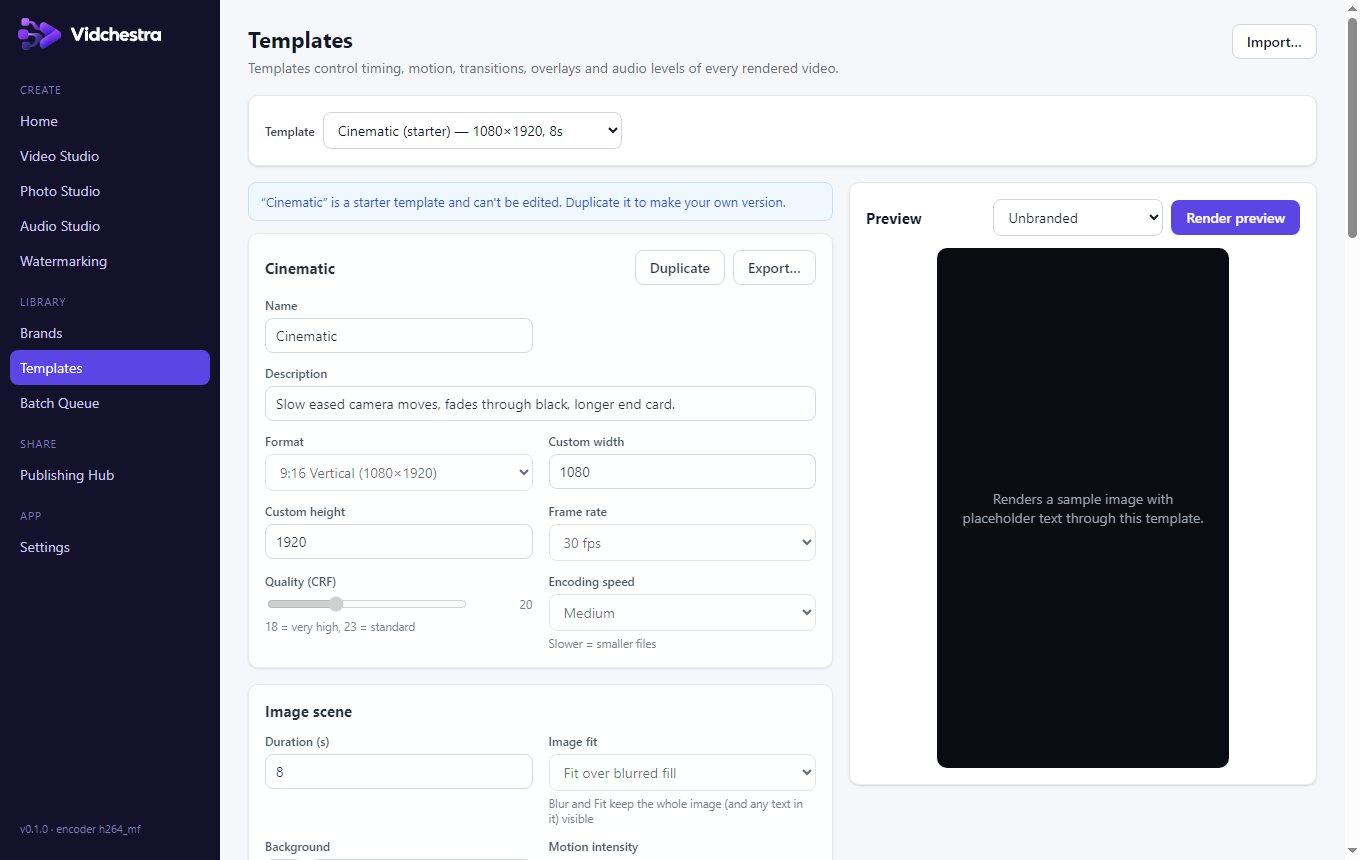
- Starter templates (Simple Social, Cinematic, Fast TikTok, Story/Reel) are read-only; Duplicate one to customise it.
- A template controls format, frame rate, quality, image duration, fit mode, motions (cycled across the batch), transitions, intro/CTA/end cards, overlays and audio levels.
- Templates can be exported to a .json file and imported on another computer.
Intro, main image and outro
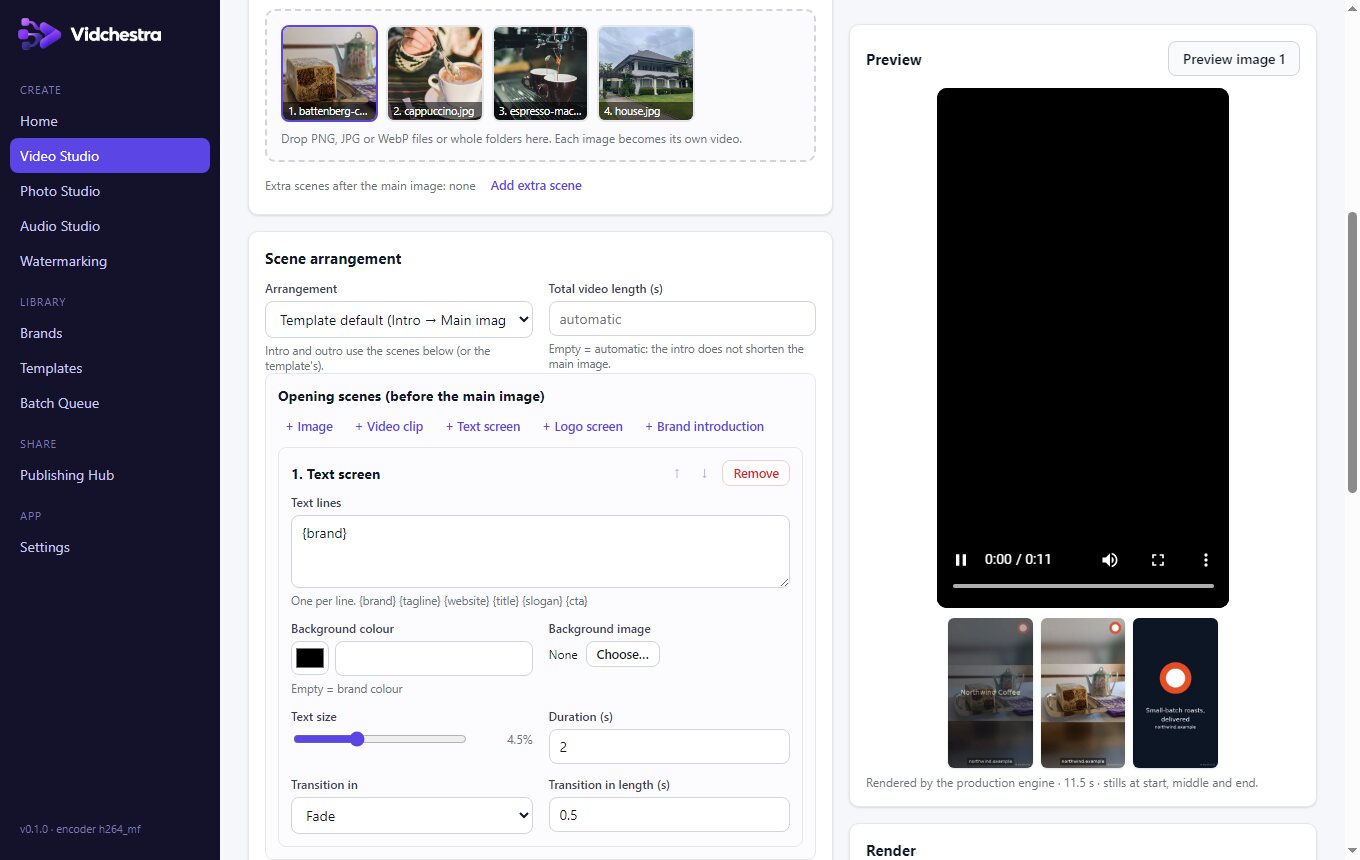
- Templates → Scene arrangement (or Video Studio → Scene arrangement for one campaign) chooses Intro → Main image → Outro, Intro → Main image, Main image → Outro or Main image only.
- Add opening and closing scenes in order: image, video clip, text screen, logo screen or brand introduction. Each has its own duration, transition and background colour or image; use ↑/↓ to reorder.
- By default an intro doesn't shorten the main image — the video gets longer. Set “Total video length” to keep every video the same length; the main image then absorbs the difference (never below 1 second or the narration).
- Music plays across the whole video; narration and brand overlays start with the main image. A video clip's own sound is not used.
Narration
- Folder mode matches audio files to images by file name: beach.jpg ↔ beach.mp3.
- CSV mode reads a file with columns image,narration and optionally caption. Paths can be relative to the CSV.
- Images without narration still render; the campaign check lists every unmatched file.
Audio Studio
- Add music, narration and sound-effect layers; set volume, start time, trim, looping and fades per layer.
- Loudness normalisation (EBU R128; −16 LUFS suits social platforms) and a limiter prevent clipping when layers add up.
- Render a preview to listen, save the mix as a preset and use it in campaigns.
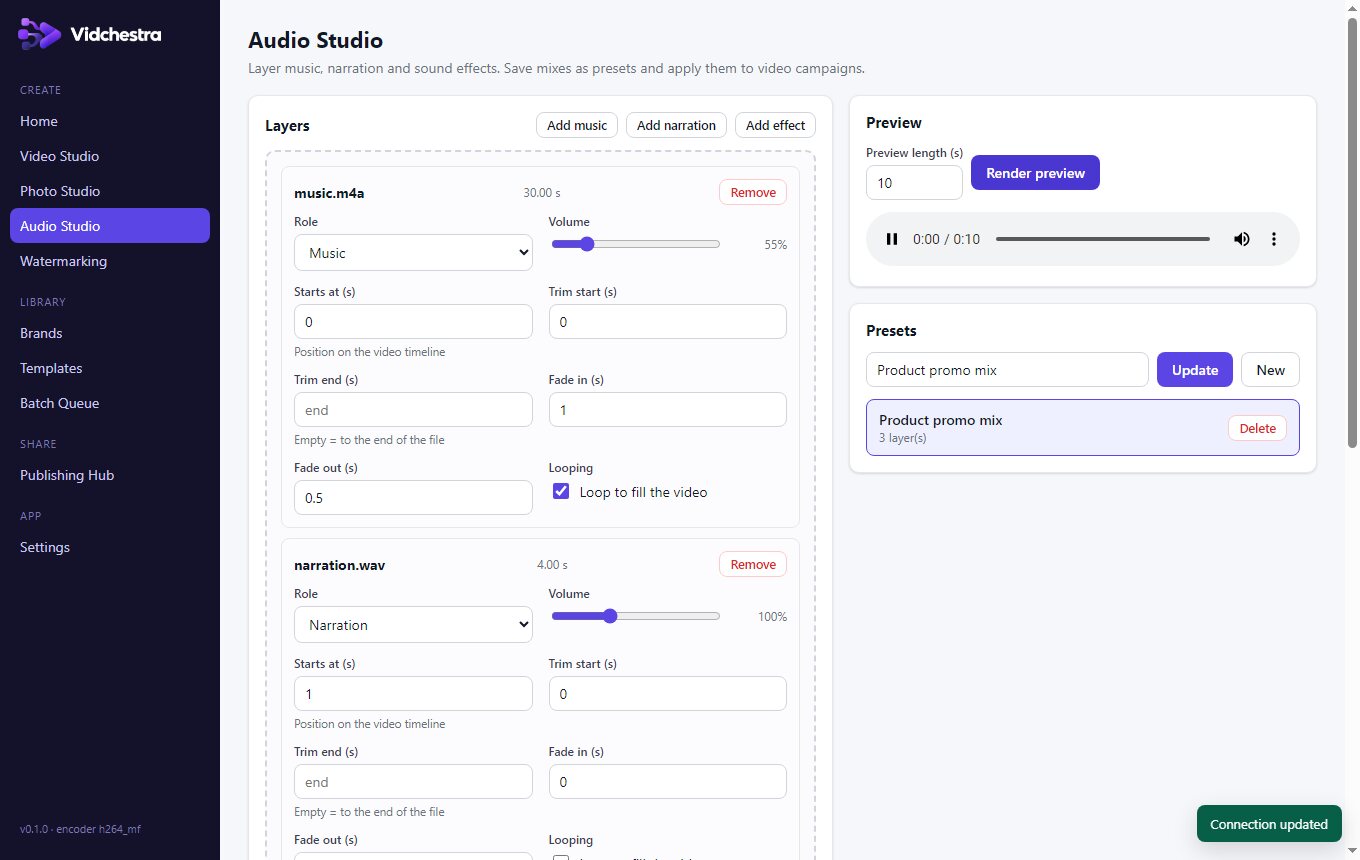
Photo Studio
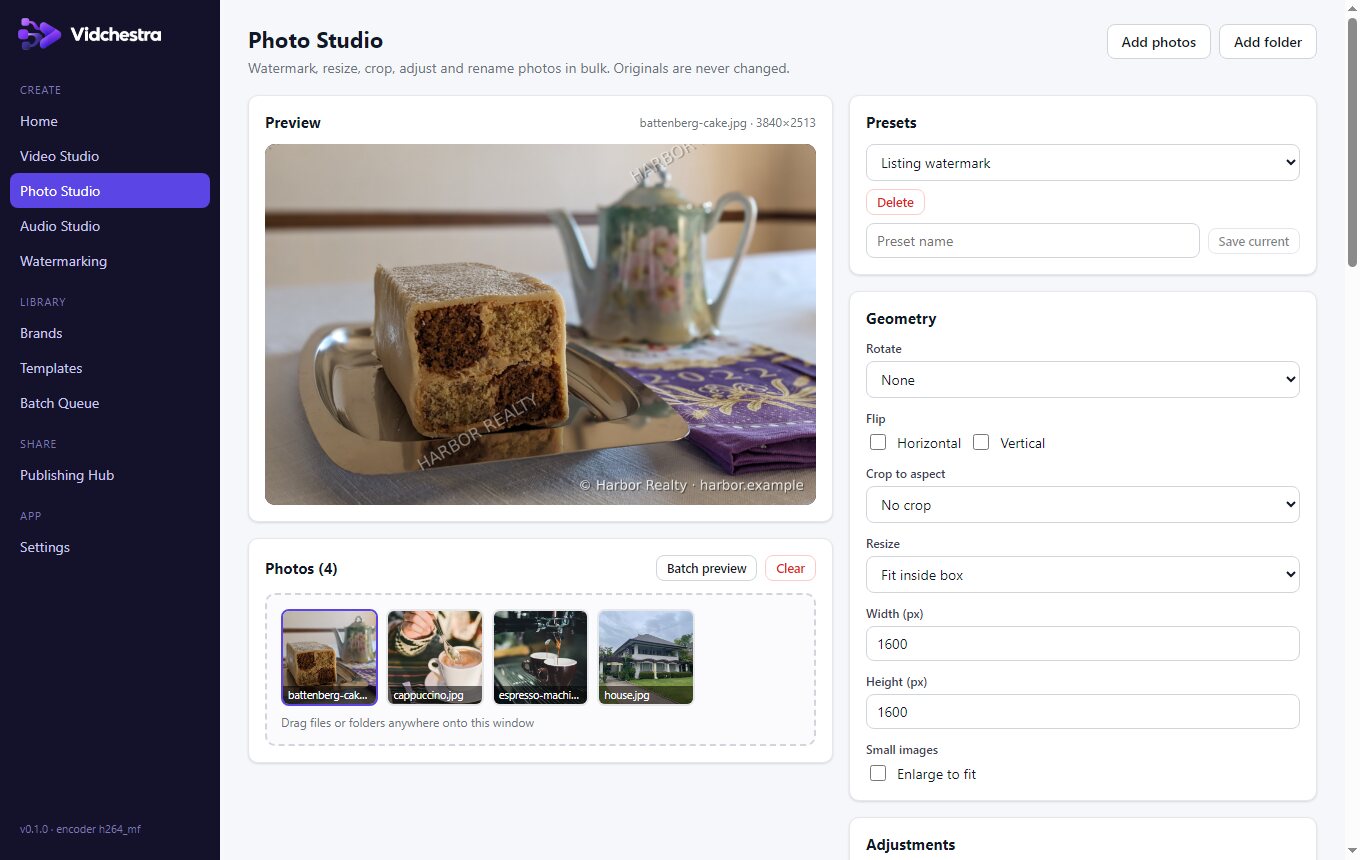
- Add photos or folders, build a recipe (geometry, adjustments, filter, border, watermarks), check the live preview, then choose an output folder and Process.
- Save recipes as presets. Output names support {name}, {index}, {index:03} and {date}.
- WebP output is lossless; JPEG quality is adjustable.
Video & document watermarking
- Videos keep their audio stream when MP4 supports it, plus their resolution, frame rate and orientation. Preview renders the first 5 seconds.
- PDF: choose pages like 1,3-5, tile or position marks. Encrypted PDFs are refused; signed PDFs are processed with a warning that the signature becomes invalid.
- DOCX: one watermark per document using Word's header watermark.
Batch queue
- Jobs are stored on disk. If Vidchestra closes or the PC restarts, unfinished jobs resume on the next launch.
- Retry failed jobs individually or all at once; Vidchestra never renders two jobs to the same file at the same time.
- Download a batch as ZIP with a JSON manifest, or export CSV/JSON manifests separately.
Publishing Hub
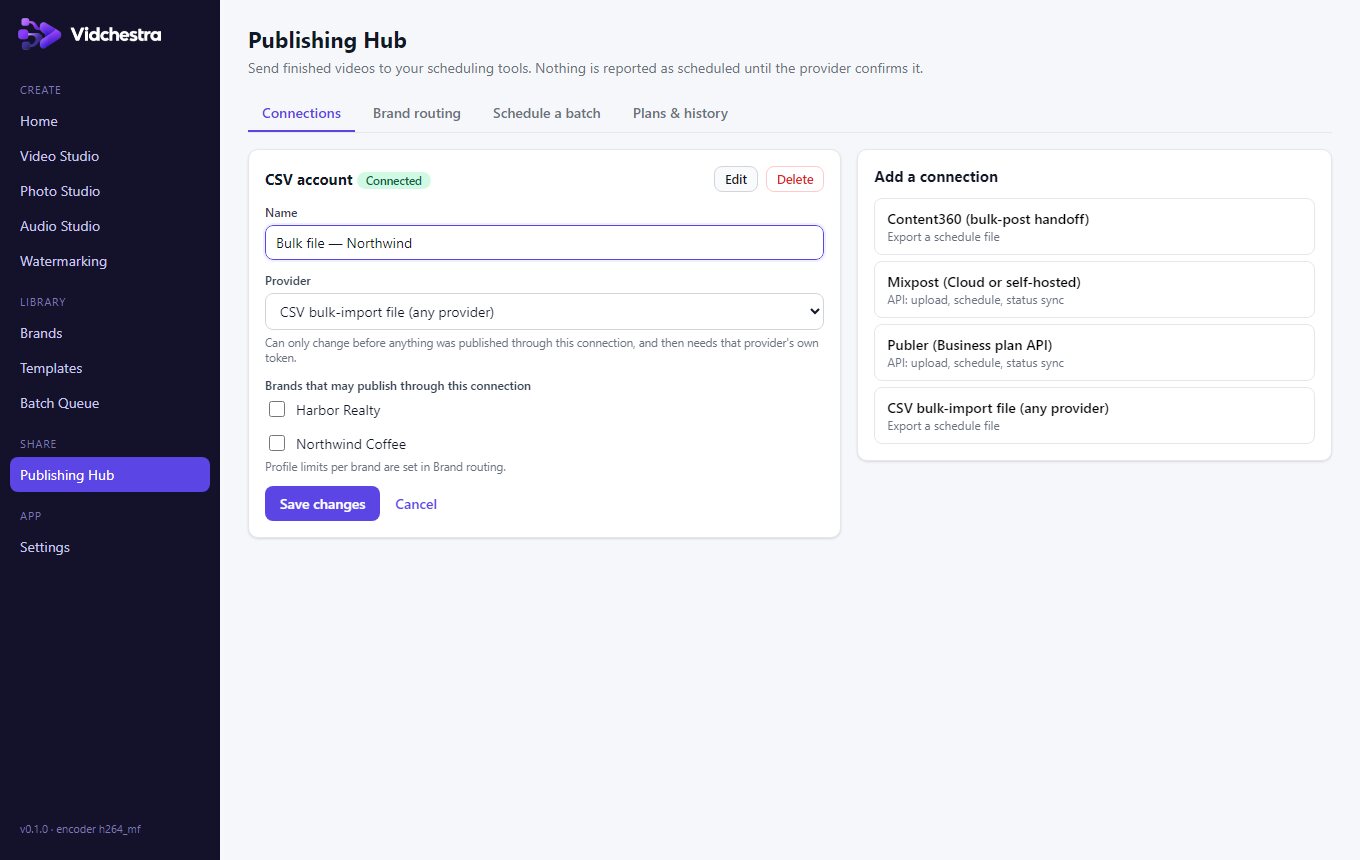
- Mixpost or Publer: create an access token / API key in the provider and paste it into Publishing Hub → Connections. Choose the workspace. Fix any setting later with Edit on the connection card — the token is kept unless you replace it.
- Content360: its API is not public yet. Add a “Content360 (bulk-post handoff)” connection, schedule the batch, then Export: Vidchestra writes the videos, a schedule sheet and step-by-step import instructions for Content360's bulk-post tool. Posts show as Exported until you have imported and approved them in Content360.
- Brand routing: tick which connections and social profiles each brand may use. Unrouted connections are only for unbranded content.
- Schedule a batch: pick a finished batch, the account and profiles, captions and times, review, then Send. Status is refreshed from the provider; a post shows as Scheduled only after the provider confirms it.
- For other schedulers, add a “CSV bulk-import file” connection and export the schedule plus videos.
Account & licence
- Sign in once per computer. The app keeps a signed licence that works offline for up to 21 days and refreshes automatically when online.
- If your subscription ends, the app switches to the Free plan's limits. Your projects and files are never deleted.
- Manage computers under Account → Computers.
Web Studio (browser)
- Log in and open Web Studio to turn photos into videos or watermark photos without installing anything. Everything renders on your device; files are not uploaded.
- In the browser: sizes up to 1920 px, motions, fit modes, opening text screen, end screen, logo/website/watermark overlays and music with fades. Narration, video clips, 4K and document or video watermarking are in the Windows app.
- Import a template exported from the Windows app (Templates → Export…); the Studio lists anything it can't render.
- Plan limits apply per batch, the same as in the Windows app.
Supported formats
- Images: JPG, PNG, WebP, BMP, GIF (first frame) and TIFF; photos are turned upright using their EXIF orientation.
- Audio: MP3, WAV, AAC and M4A (and most formats FFmpeg reads).
- Videos to watermark: MP4, MOV, MKV, WebM and AVI. Output: MP4 with H.264 video and AAC audio.
- Documents: PDF and Word (.docx). Save older .doc files as .docx first.
- Video sizes: 9:16, 1:1, 4:5, 16:9 or custom up to 7680 px; 24, 30 or 60 fps.
Troubleshooting
- “Windows protected your PC” when installing: the installer isn't code-signed yet. Choose More info → Run anyway only if you downloaded it from vidchestra.com.
- “Your Free plan allows up to 5 videos per batch”: split the batch or upgrade. The limit belongs to your account, so reinstalling doesn't change it.
- “Your Free plan exports up to 720p”: choose a 720p size (e.g. 720×1280) in the template's output settings, or upgrade. Creator exports up to 1080p, Pro up to 4K. Free also includes one background music track per video; narration and extra layers need Creator or Pro.
- “licence belongs to another computer — sign in again”: the app's data was copied from another PC. Sign in on this computer (Settings → Account).
- “this build has no licence key”: the app was built without the official licence key; install the official build from the Download page.
- Rendering is slow: the footer shows the encoder in use. Hardware encoders (NVIDIA, Intel, AMD, Windows Media Foundation) are used automatically when they work.
- A watermark doesn't show in Word: it lives in the page header — use Print Layout view. Word Online may hide header watermarks.
- Web Studio says the audio is Opus: your browser has no AAC encoder. Use Chrome or Edge on Windows/macOS, or the Windows app, for files that must play on Apple devices.
- Still stuck? Contact support from the Help page with the batch name and the error shown in Batch Queue.